How to protect your documents with a password?
- Introduction
- Step 1: Download and install Soft4Boost Document Converter
- Step 2: Run the program and load your input documents
- Step 3: Set the output file format
- Step 4: Enable password protection
- Step 5: Set the output name for your documents
- Step 6: Set the destination folder
- Step 7: Convert your documents
If you are going to send your files by e-mail or post them on the web you can encrypt your documents with a password to prevent unauthorized access. You can maintain your electronic documents confidentiality using Soft4Boost Document Converter. It also lets you protect your files from modifying, printing or copying information.
Step 1: Download and install Soft4Boost Document Converter
Click here to download it. After the download is finished, run the S4BDocumentConverter.exe file and follow the installation wizard instructions.
Step 2: Run the program and load your input documents
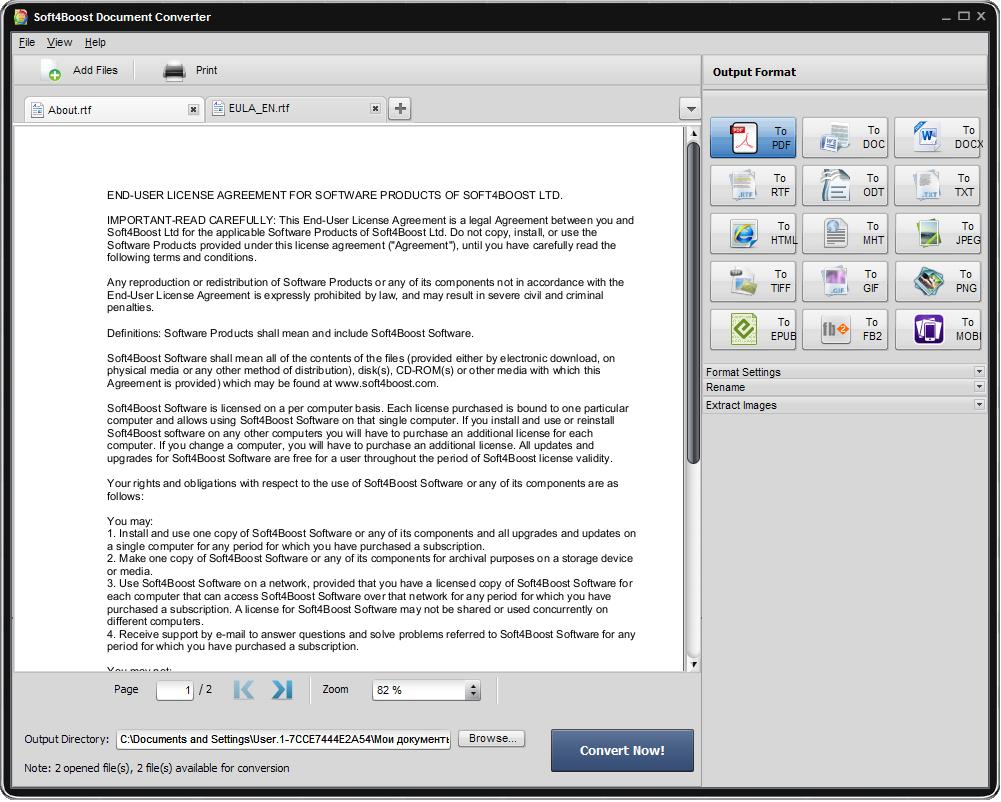
First of all run Soft4Boost Document Converter. To do that find the corresponding program icon on your desktop and double-click it. If you unchecked the Create desktop icon box during the installation, you can run the program from the Start menu. Please follow Start > All Programs > Soft4Boost > Document Converter.
To load files which you would like to convert click the Add Files button on the top of the program window. In the opened Windows Explorer window select the needed files and press the Open button.

After the selected documents are imported into the program you will be able to view them in the Preview Area. To navigate between them use the tabs above the Preview Area.
Step 3: Set the output file format
Click the To PDF button in the Output Format section of the Working Area. The Format Settings panel will be available in the Working Area. Click the black arrow to expand it.
Step 4: Enable password protection
Open the Format Settings section in the Working Area by clicking the black arrow near it. Check the Permissions check-box to enable password security for all the documents loaded to the program.
Set passwords for your documents. Type the owner password in the Owner field. This password will provide you with a complete access to your documents. Type the user password in the User field (this password must differ from the owner password). To open password protected documents users will have to enter this password.
You can also restrict usage of your content by users. To disable certain operations on protected documents check one or a number of options from the Restrict field. It is possible to disable Editing, Printing and Copying content of your files.
Note: to set usage restrictions you have to set the Owner and User passwords at first.
If you want to disable password protection before converting documents uncheck the Permissions check-box.
Step 5: Set the output name for your documents
Open the Rename section of the Working Area and select one of the available presets from the Preset drop-down list. You can preserve the Original name or select the Text + Counter preset to type your own name in the Text field. The resulting name will be composed of your text and a file sequence number.
Step 6: Set the destination folder
Click the Browse... button next to the Output Directory field in the Output File Area and select the folder where you would like to save your converted files.
Step 7: Convert your documents
To start the conversion process press the Convert Now! button in the right bottom corner of the program window. You will see the overall progress on the progress bar in the center of the Preview Area.
