
How to convert images to PDF format?
- Introduction
- Step 1: Download and install Soft4Boost Image Converter
- Step 2: Run Soft4Boost Image Converter, load and organize your input files
- Step 3: Set output PDF format and adjust its settings
- Step 4: Apply effects or watermarks to your images (optional)
- Step 5: Set output parameters
- Step 6: Convert your images
If you want to join a series of photos into an electronic booklet or you need to prepare them for printing, sending via e-mail or web publishing you can convert them to the Portable Document Format (PDF) because PDF documents are universally accessible and they can be viewed and printed on any computer regardless of operating system or printing device. With the help of Soft4Boost Image Converter you can perform this task without any difficulties. Please follow the steps listed below.
Step 1: Download and install Soft4Boost Image Converter
Click here to download it. After the download is finished, run the S4BImageConverter.exe file and follow the installation wizard instructions.
Step 2: Run Soft4Boost Image Converter, load and organize your input files
First of all run Soft4Boost Image Converter. To do that find the corresponding program icon on your desktop and double-click it. If you unchecked the Create desktop icon box during the installation, you can run the program from the Start menu. Please follow Start > All Programs > Soft4Boost > Image Converter.
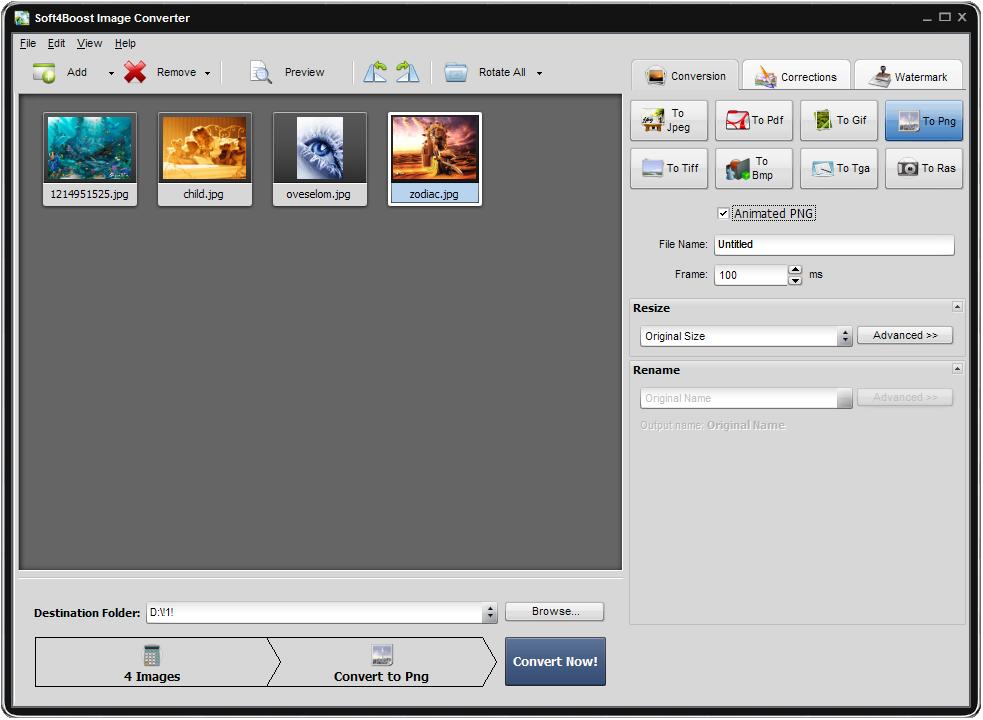
To load image files you would like to convert click the Add button on the Toolbar. You will be able to load a series of images stored on your computer HDD.
To load a folder with images stored on your computer HDD click the black arrow next to the Add button and select the Add Folder option.
In the opened window browse for the necessary files or folder and press the Open button. All loaded images will be displayed in the Preview Area.
If you plan to save all the images to a single document, you need to set the necessary order of your images. You can perform this task within the Preview Area when the Thumbnails mode is activated. Click the image which is required to be moved and then drag and drop it to the desired position.
Step 3: Set output PDF format and adjust its settings
Press the To Pdf button on the Conversion tab to set the output image format. Pay attention to the opened Pdf settings located under the format buttons.
Select the needed Page Format from the appropriate drop-down list. You can select one of the standard presets or the By Image Size option. If you choose this option the Resize section of the Conversion tab will be available and you will be able to resize your images as you want. To do that you can use one of the available presets from the drop-down list in the Resize section or click the Advanced >> button to set a particular size manually.
The In one document option is checked by default. Don't uncheck it if you need to merge all the images into a single multipage file. Then type the output file name in the File Name field (in this case the Rename section of the Conversion tab will be disabled).
Step 4: Apply effects or watermarks to your images (optional)
You can also apply some effects to your images before converting them. If you want to protect your copyrights or insert some comments to your photos you can add text or image watermark to them.
If you want to resize your images you can perform this task at the Conversion tab using the Resize section and selecting the desired preset from the drop-down list. You can click the Advanced >> button to manually set a particular size.
You can also change output name in the Rename section of the Conversion tab.
Then set output folder for the resulting files. To do that select one of the folders from the Destination Folder drop-down list. If you want to specify your own folder press the Browse... button. In the opened window browse for the desired directory and press the OK button.
Click the Convert Now! button to start the conversion process. Wait while the software converts your images. You can see overall progress at the Progress bar in the center of the Preview Area. You can use them according to your needs.